<strong>Setting up S/MIME</strong> on macOS Sierra & iOS
Setting up S/MIME is actually not that hard. That said, it’s probably still too nerdy for a normal user so this type of email encryption is likely not something for non-technical people.
You need a Email certificate by an authority
Of course you could create a certificate yourself but then no one would trust this manually so it’d be useless. However, there are a very few providers that offer S/MIME certificates. Most are expensive, one is free: startssl.com. I’ll be honest, I don’t like them too much but it’s free and does its job.
Sign up with your email address that you want the certificate for. Then you’ll need to request a free email (S/MIME) certificate from your dashboard.
When it goes to creating a certificate, the best option to create the certificate yourself. I’m going to quickly describe how to do this on a Mac:
Create Certificate Request in macOS Sierra
Go to your Keychain Access.app and from the menu choose “Certificate Assistant”. Then, continue with “Request a Certificate From a Certificate Authority…”.

You’ll now see a wizard asking you to enter your email address (that you want to use for signing and encrypting), a common name and what to do with the request.
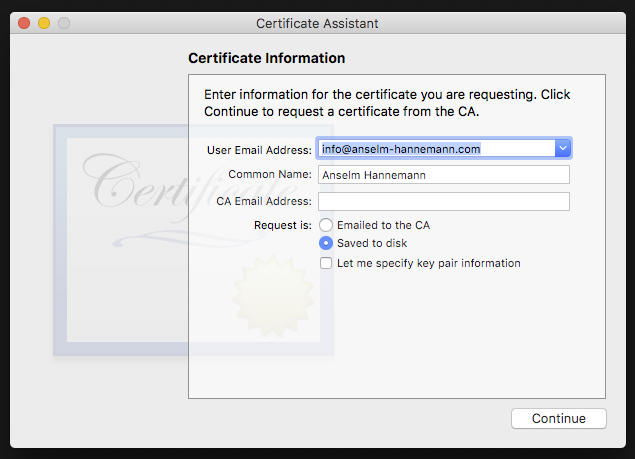
Choose “Saved to Disk” here and save the Signing Request to your filesystem.
Request Certificates
Now go back to your StartSSL dashboard and continue there with the wizard. You can now enter the content of your Signing Request file (just copy and paste it) into a text area. Finally, you can now request the certificates and download them.
Import the Certificate on macOS
The downloaded bundle contains the certificate that you can now import into your keychain by double clicking on it. Use the .crt file that has the email address in its file name.
Use it in Mail.app
Mail.app will automatically discover the certificate and will display you a lock and a sign-icon in the “Write new Email” window. This is for S/MIME encryption and should be checked on if you like to send your signature or encrypt the email.
If you have a contact sending you an email with a valid S/MIME signature, Mail will recognize it and from then on will be able to encrypt messages between you both.
Export the Certificate for iOS
If we want to use the certificate on iOS as well, we need to export it. Therefore, in your keychain app, do a right click on the certificate and choose export. Follow the wizard to export the certificate as .p12 file.
Now transfer this .p12 file to your iPhone using Mail or AirDrop. You can open this file on the iPhone and will be asked if you want to import the certificate. Enter your credentials and add this certificate to iOS.
Finally, after importing the certificate to iOS, you can now go to your Settings -> Mail -> [Your Account] -> IMAP -> Advanced -> Use S/MIME -> Check on “Sign by default” or “Encrypt by default” as you prefer.
Now you can sign your emails. If you want to encrypt emails with others, you need to get an email with a valid signature from the other person. Then, tap on the signature and install it on your phone. Unfortunately and unlike on macOS, iOS doesn’t auto-import these signatures for you.
Hope this guide helped you setting up S/MIME on your Apple systems.